Perceptual Ability Test
About This Test
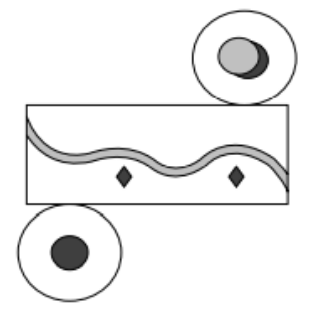
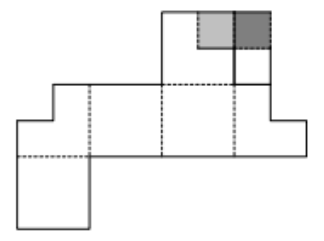
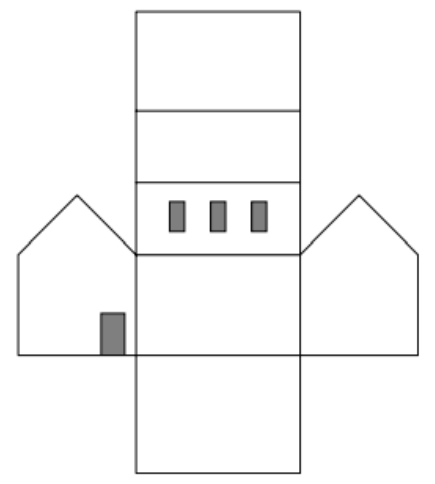
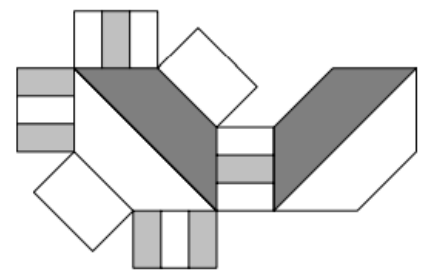
The Perceptual Ability Test (PAT) is the visual-spatial section of the Dental Admission Test (DAT), the examination taken by applicants to dental schools in the United States and Canada. It measures how well you can picture objects in two and three dimensions and manipulate them mentally.
The original PAT was timed 60 minutes with all six sections pooled, but this version times each item type separately to better standardize the collected data.
Current norms are preliminary and this test will be renormed in the future.
Contents
| Part | Section | Questions | Time |
|---|---|---|---|
| 1 | Apertures | 15 | 11 min |
| 2 | View Recognition | 15 | 12 min |
| 3 | Angle Ranking | 15 | 7 min |
| 4 | Hole Punching | 15 | 9 min |
| 5 | Cube Counting | 15 | 9 min |
| 6 | Pattern Folding | 15 | 12 min |
| Total | 90 | 60 min |
Directions
- Each part is preceded by its own instructions and a worked example. Read them carefully, it is important you understand each task before beginning; reading time is not counted. The instructions are also visible during each section in case you need a reminder.
- Each part is timed separately, from 7 to 12 minutes as listed above. The timer starts when you begin the part.
- Mark one answer for each question by filling in its lettered bubble.
- When time is called, the next part begins automatically. You may move on early, but you may not return to a part once you leave it.
- You may use a pencil and scratch paper. You may not use a calculator, ruler, protractor, or any other measuring tool, or receive help from anyone.
- Complete the test in one sitting. Your score is shown at the end.
Do not begin until you are ready to work without interruption.
Part 1: Apertures
Read the instructions and example below. The 11 minute timer for Part 1 starts when you begin. These instructions are also repeated at the top of the part.
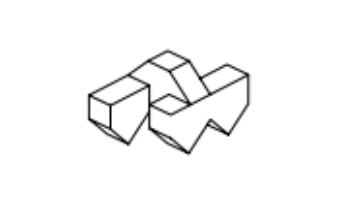
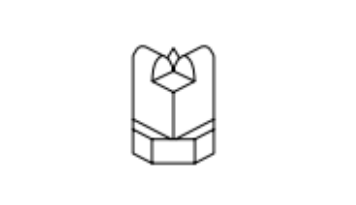
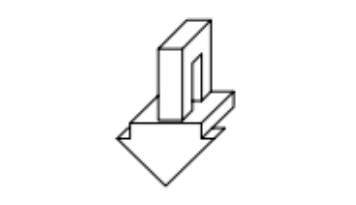
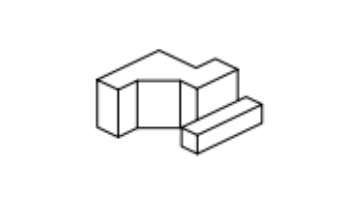
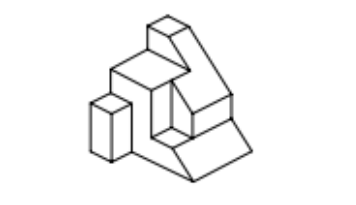
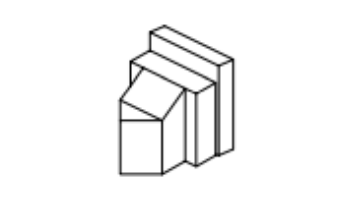
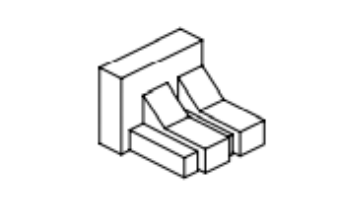
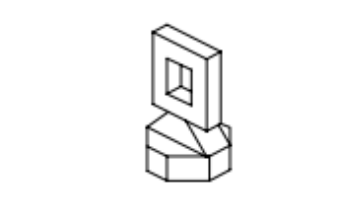
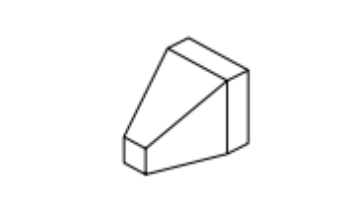
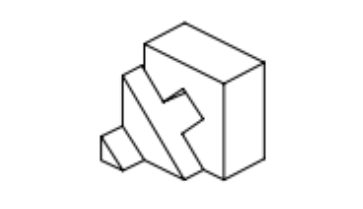
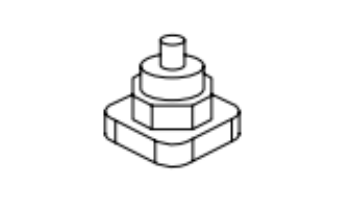
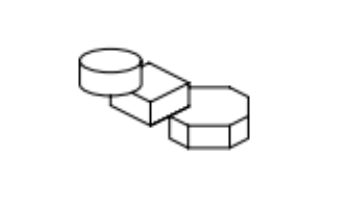
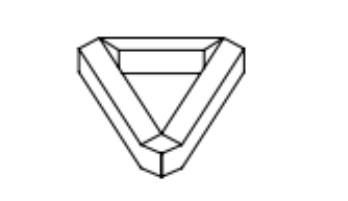
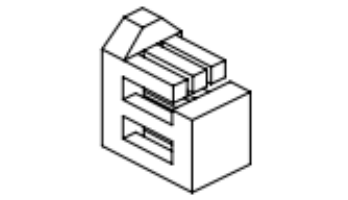
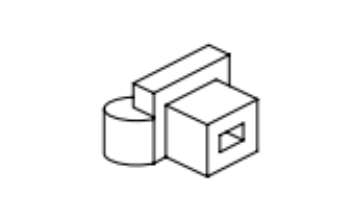
For Questions 1–15, this visualization test consists of a number of items like the ones below. A three-dimensional object is shown at the left. This is followed by outlines of five apertures or openings.
All of the tasks throughout this test are identical. The first step is to look at the object and imagine how it looks from every viewpoint. Then select the appropriate aperture from the five choices that will accommodate the object passing through it, if the object is inserted from the correct side.
Here are the rules:
- Prior to passing through the aperture, the irregular solid object may be turned in any direction. It may be started through the aperture on a side not shown.
- Once the object is started through the aperture, it may not be twisted or turned. It must pass completely through the opening. The opening is always the exact shape of the appropriate external outline of the object.
- Both objects and apertures are drawn to the same scale. Thus, it is possible for an opening to be the correct shape but too small for the object. In all cases, however, differences are large enough to judge by eye.
- There are no irregularities in any hidden portion of the object. However, if the figure has symmetric indentations, the hidden portion is symmetric with the part shown.
- For each object there is only one correct aperture.
Example:
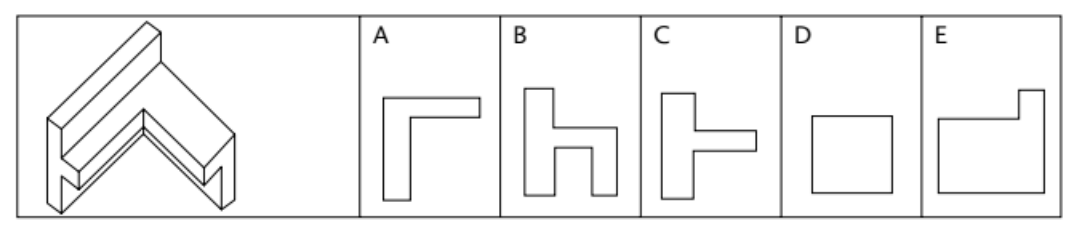
The correct answer is E since the object would pass through this aperture if the side at the left were introduced first.
When you are ready, begin Part 1. You will have 11 minutes for its 15 questions.
Part 1: Apertures
For Questions 1–15, this visualization test consists of a number of items like the ones below. A three-dimensional object is shown at the left. This is followed by outlines of five apertures or openings.
All of the tasks throughout this test are identical. The first step is to look at the object and imagine how it looks from every viewpoint. Then select the appropriate aperture from the five choices that will accommodate the object passing through it, if the object is inserted from the correct side.
Here are the rules:
- Prior to passing through the aperture, the irregular solid object may be turned in any direction. It may be started through the aperture on a side not shown.
- Once the object is started through the aperture, it may not be twisted or turned. It must pass completely through the opening. The opening is always the exact shape of the appropriate external outline of the object.
- Both objects and apertures are drawn to the same scale. Thus, it is possible for an opening to be the correct shape but too small for the object. In all cases, however, differences are large enough to judge by eye.
- There are no irregularities in any hidden portion of the object. However, if the figure has symmetric indentations, the hidden portion is symmetric with the part shown.
- For each object there is only one correct aperture.
Example:
The correct answer is E since the object would pass through this aperture if the side at the left were introduced first.
Part 2: View Recognition
Read the instructions and example below. The 12 minute timer for Part 2 starts when you begin. These instructions are also repeated at the top of the part.
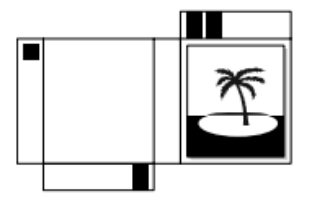
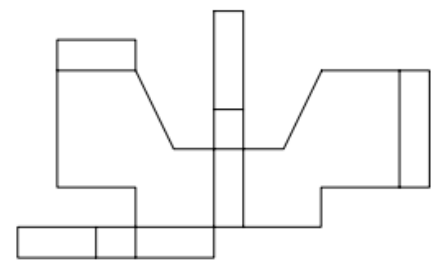
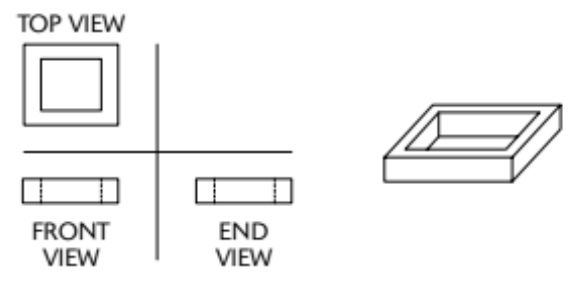
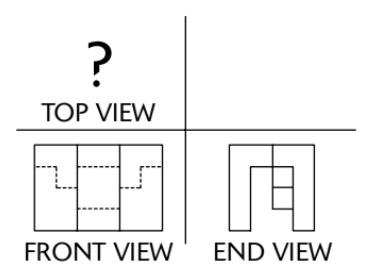
For Questions 16–30, the following pictures illustrate top, front, and end views of various solid objects. The views are flat—without perspective, which means that the points in the viewed surface are viewed along parallel lines of vision. In the upper-left corner is the top view and the projection is looking down on it. In the lower-left corner is the front view, and the projection is looking at the object from the front. In the lower-right corner is the projection looking at the object from the end, which is labeled end view. These views are always in the same positions and are labeled accordingly.
Note that lines that cannot be seen on the surface in some particular view are dotted in that view.
In the problems that follow, two views will be shown, with four alternatives to complete the set. It is not always the end view that must be selected; sometimes it is the top view or front view that is missing.
The views are arranged like this:
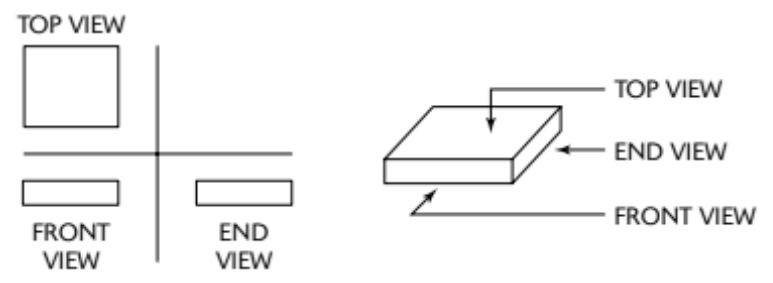
If there were a hole in the block, the views would look like this:
Example: Choose the correct end view.
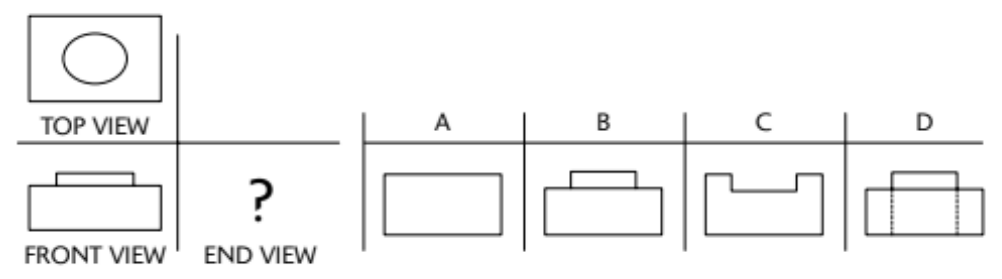
The front view shows that there is a smaller block on the base and that there is no hole. The top view shows that the block is round and in the center of the base. The answer, therefore, must be B.
When you are ready, begin Part 2. You will have 12 minutes for its 15 questions.
Part 2: View Recognition
For Questions 16–30, the following pictures illustrate top, front, and end views of various solid objects. The views are flat—without perspective, which means that the points in the viewed surface are viewed along parallel lines of vision. In the upper-left corner is the top view and the projection is looking down on it. In the lower-left corner is the front view, and the projection is looking at the object from the front. In the lower-right corner is the projection looking at the object from the end, which is labeled end view. These views are always in the same positions and are labeled accordingly.
Note that lines that cannot be seen on the surface in some particular view are dotted in that view.
In the problems that follow, two views will be shown, with four alternatives to complete the set. It is not always the end view that must be selected; sometimes it is the top view or front view that is missing.
The views are arranged like this:
If there were a hole in the block, the views would look like this:
Example: Choose the correct end view.
The front view shows that there is a smaller block on the base and that there is no hole. The top view shows that the block is round and in the center of the base. The answer, therefore, must be B.
Choose the correct TOP VIEW.
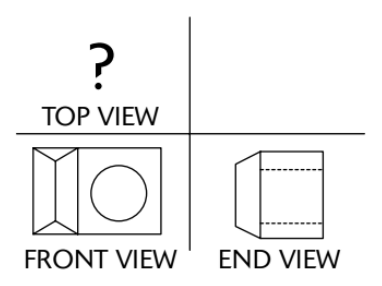
Choose the correct TOP VIEW.
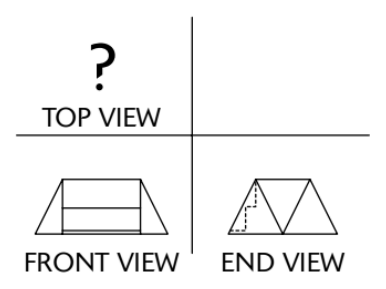
Choose the correct TOP VIEW.
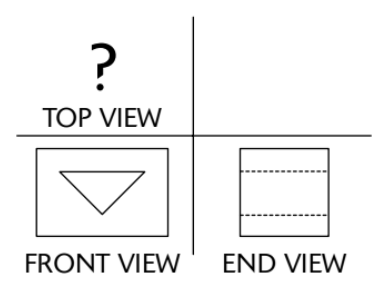
Choose the correct END VIEW.
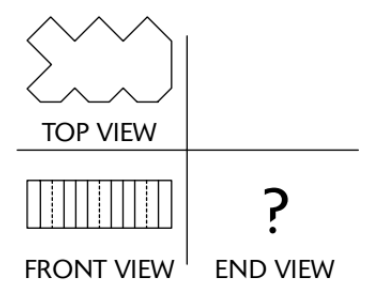
Choose the correct FRONT VIEW.
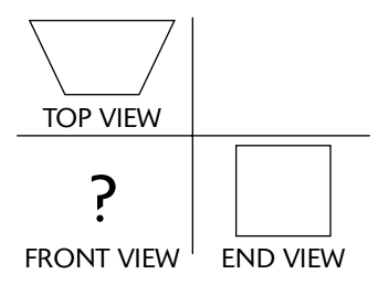
Choose the correct END VIEW.
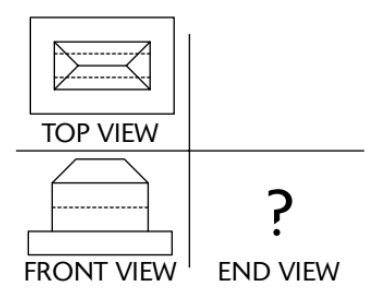
Choose the correct END VIEW.
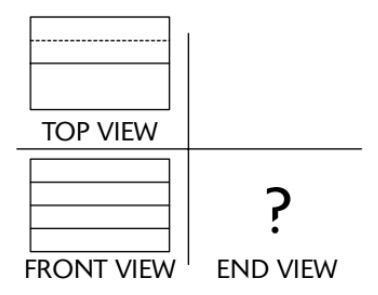
Choose the correct END VIEW.
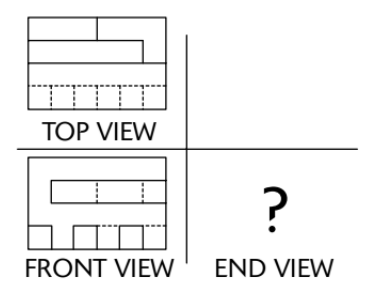
Choose the correct TOP VIEW.
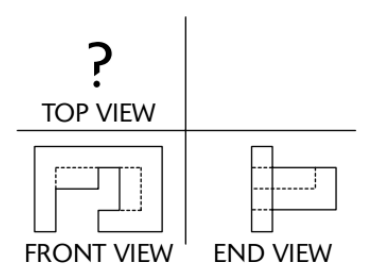
Choose the correct END VIEW.
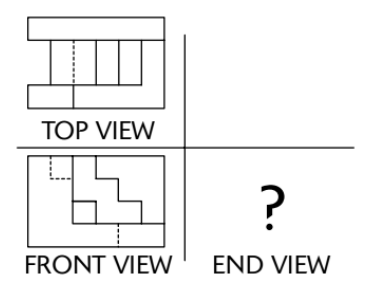
Choose the correct END VIEW.
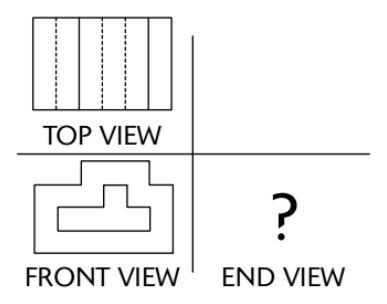
Choose the correct END VIEW.
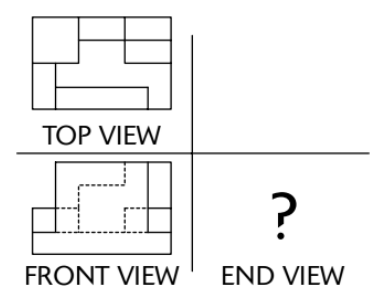
Choose the correct TOP VIEW.
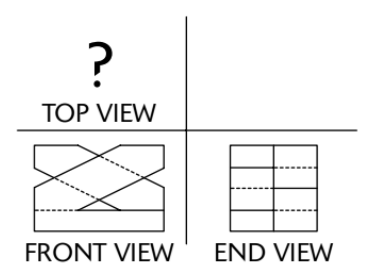
Choose the correct FRONT VIEW.
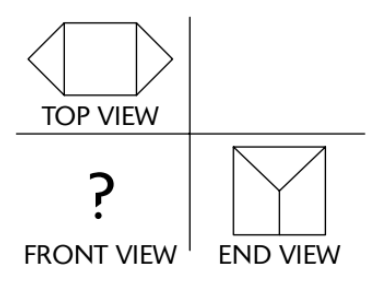
Choose the correct TOP VIEW.
Part 3: Angle Ranking
Read the instructions and example below. The 7 minute timer for Part 3 starts when you begin. These instructions are also repeated at the top of the part.
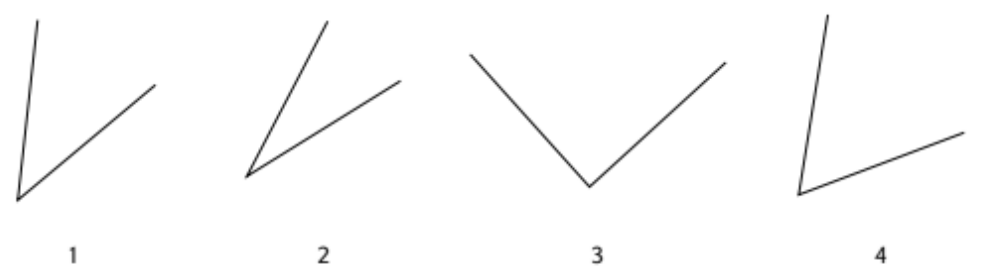
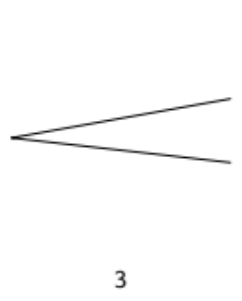
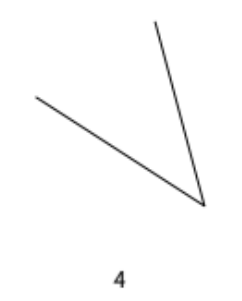
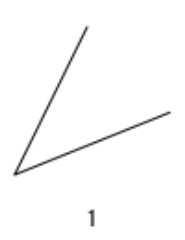
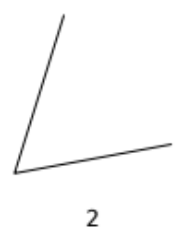
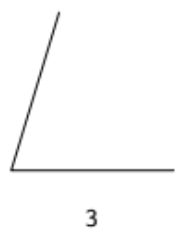
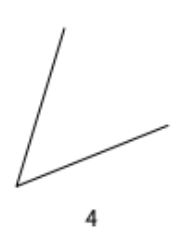
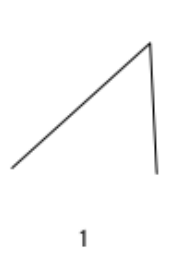
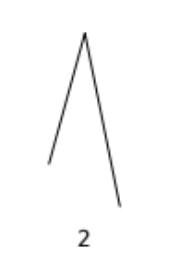
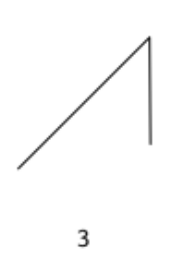
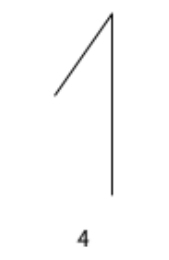
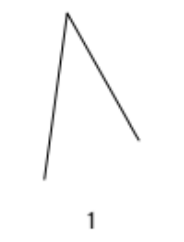
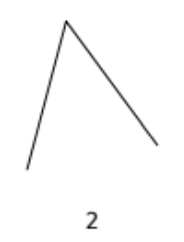
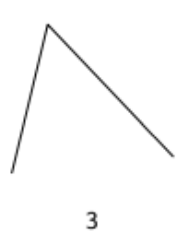
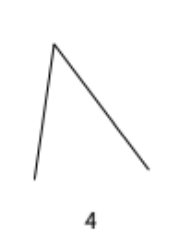
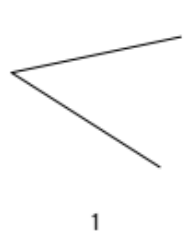
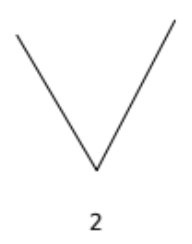
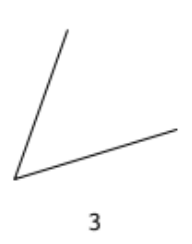
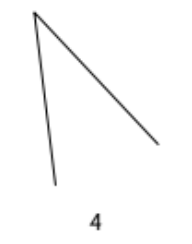
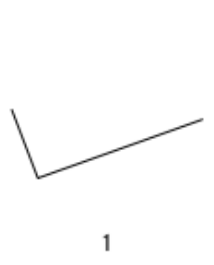
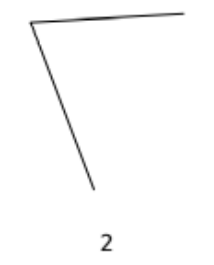
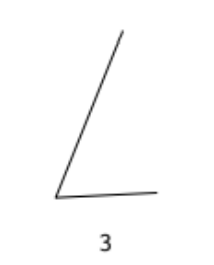
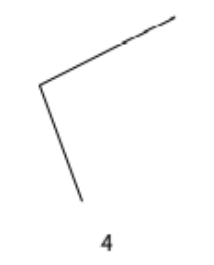
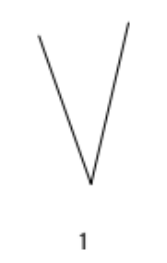
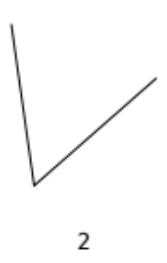
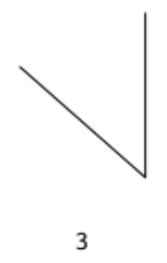
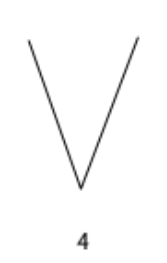
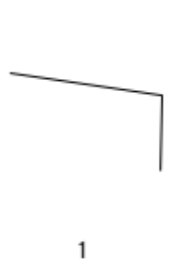
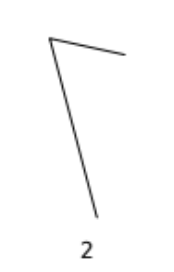
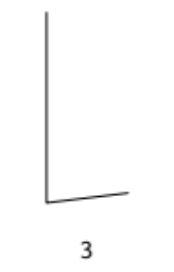
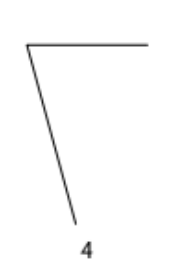
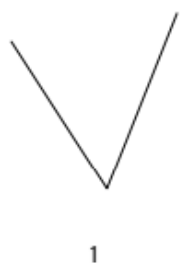
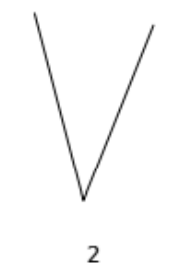
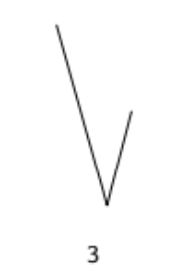
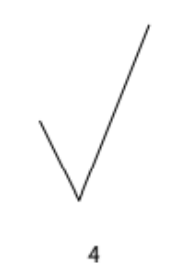
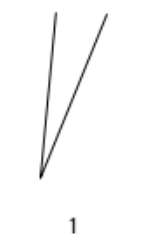
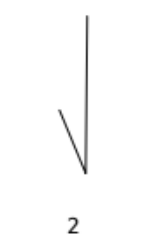
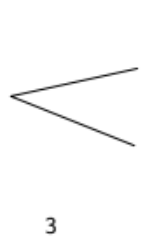
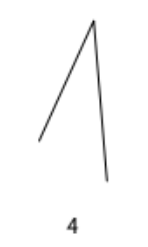
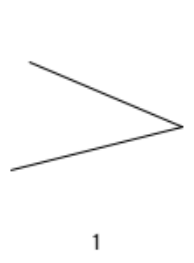
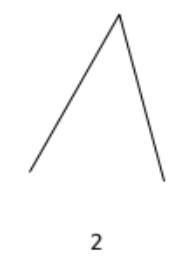
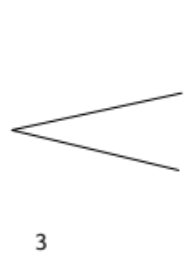
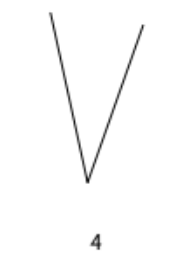
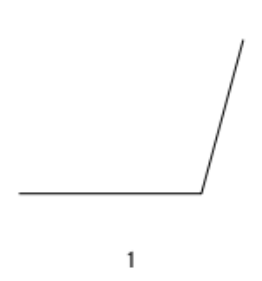
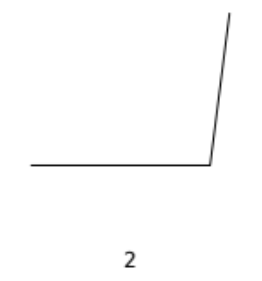
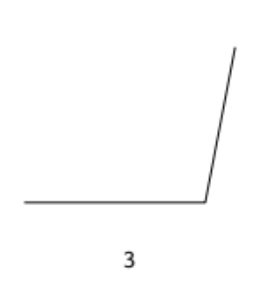
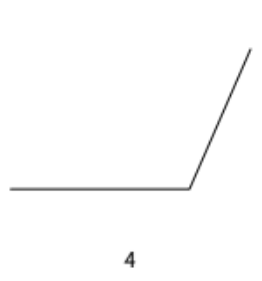
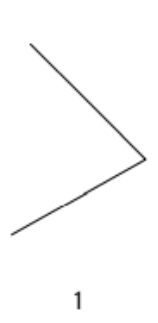
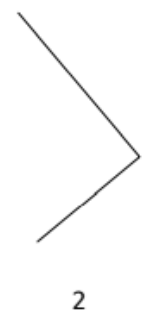
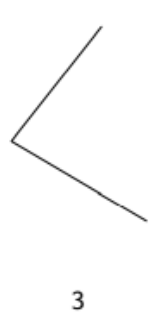
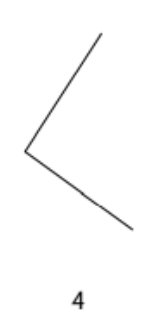
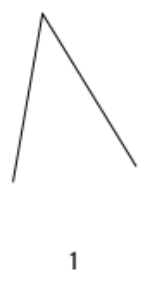
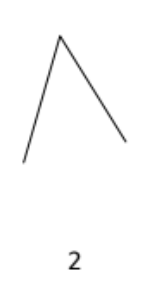
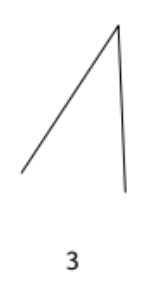
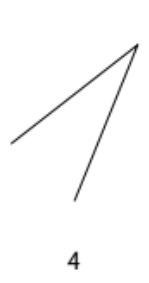
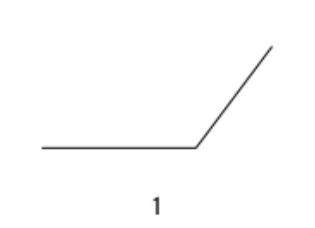
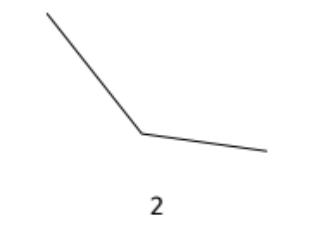
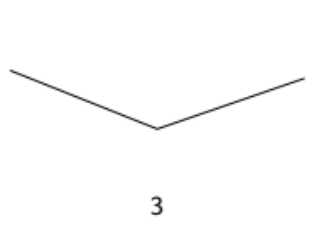
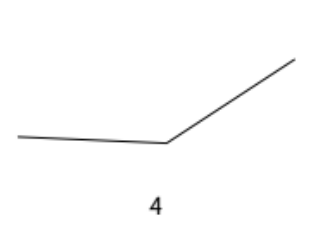
For Questions 31–45, you are asked to examine the four INTERIOR angles and put them in order in terms of degrees from SMALL TO LARGE. Select the choice that has the correct ranking.
Example:
- 1 – 2 – 3 – 4
- 2 – 1 – 4 – 3
- 1 – 3 – 2 – 4
- 3 – 4 – 1 – 2
The correct ranking of the angles from small to large is 2 – 1 – 4 – 3; therefore, B is correct.
When you are ready, begin Part 3. You will have 7 minutes for its 15 questions.
Part 3: Angle Ranking
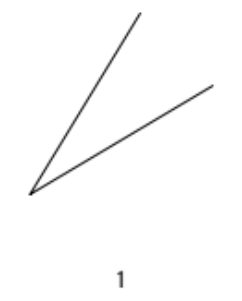
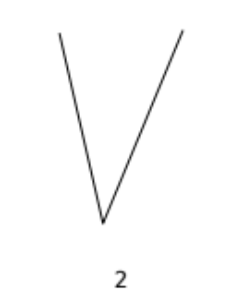
For Questions 31–45, you are asked to examine the four INTERIOR angles and put them in order in terms of degrees from SMALL TO LARGE. Select the choice that has the correct ranking.
Example:
- 1 – 2 – 3 – 4
- 2 – 1 – 4 – 3
- 1 – 3 – 2 – 4
- 3 – 4 – 1 – 2
The correct ranking of the angles from small to large is 2 – 1 – 4 – 3; therefore, B is correct.
Part 4: Hole Punching
Read the instructions and example below. The 9 minute timer for Part 4 starts when you begin. These instructions are also repeated at the top of the part.
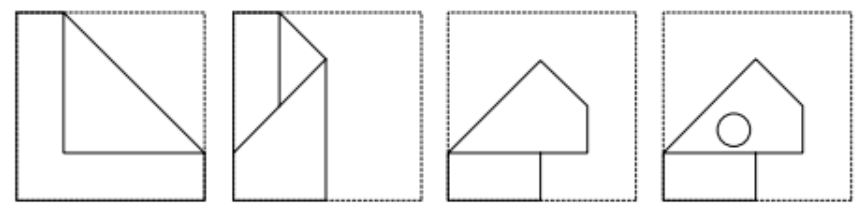
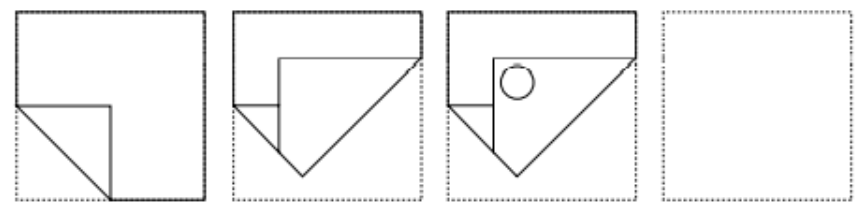
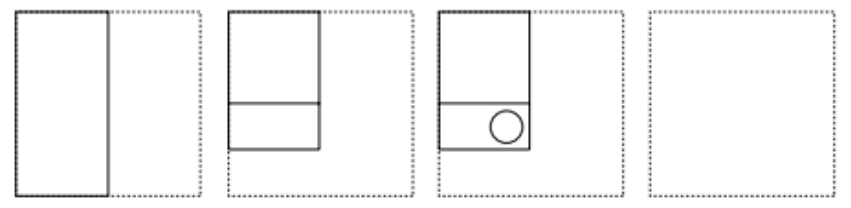
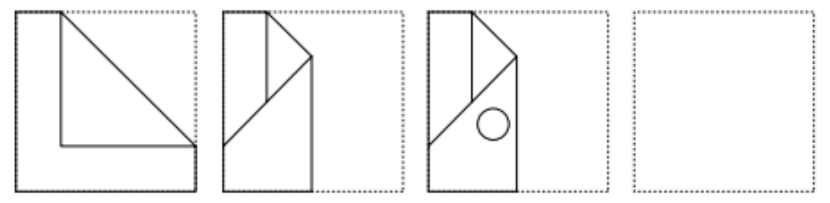
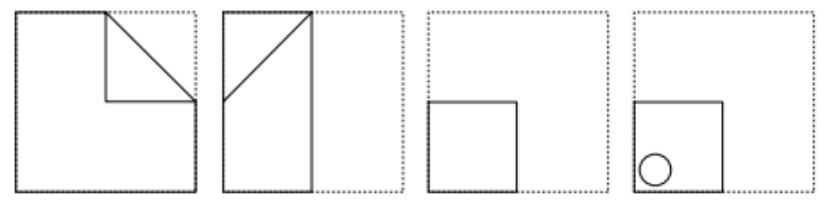
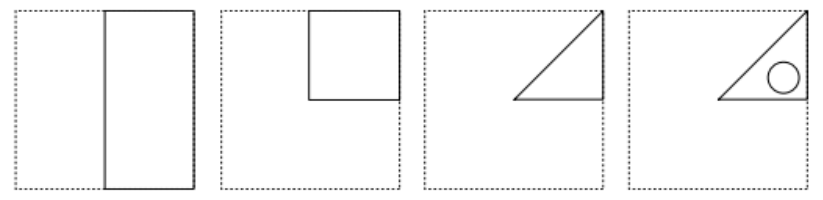
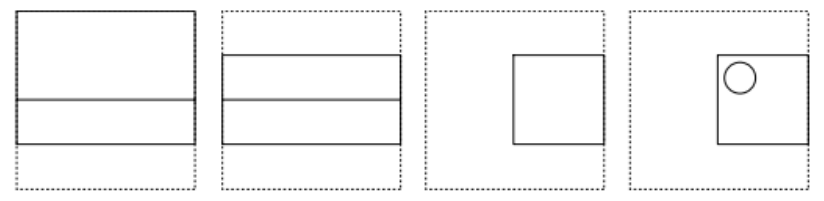
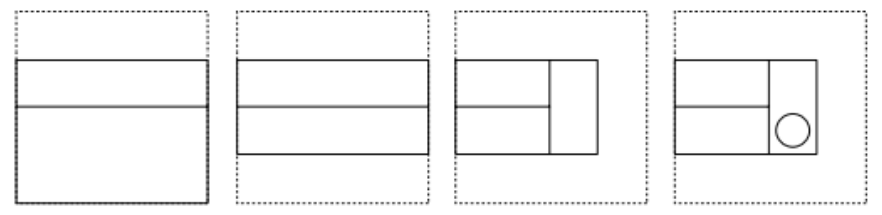
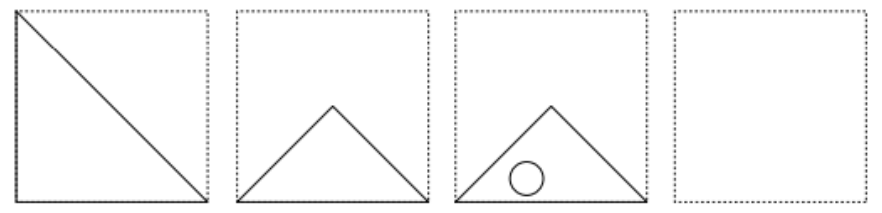
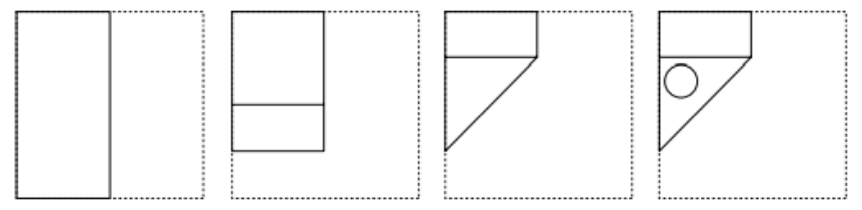
For Questions 46–60, you are presented with a square of paper that has been folded at least one or more times. The solid lines indicate where the paper has been folded, and the dotted lines represent where the paper was before it was folded. The paper is never turned so that when you unfold it, it should remain in the same position. The paper will always be folded within the original square. After the last fold has been made, a hole is punched in the paper. Your task is to mentally unfold the paper and determine where the holes will be on the original square. You will be given five choices (A–E) from which to make your choice.
Example 1:
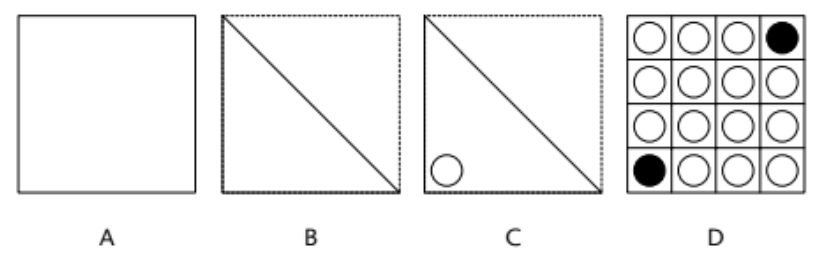
In Example 1, Figure A represents the original paper, unfolded. The second figure, B, represents the first fold. The third illustration shows where the hole is punched. After the paper is unfolded, there will be two holes represented by the dark circles in the last illustration (D).
The following example shows how this type of question will appear on the test.
Example 2:
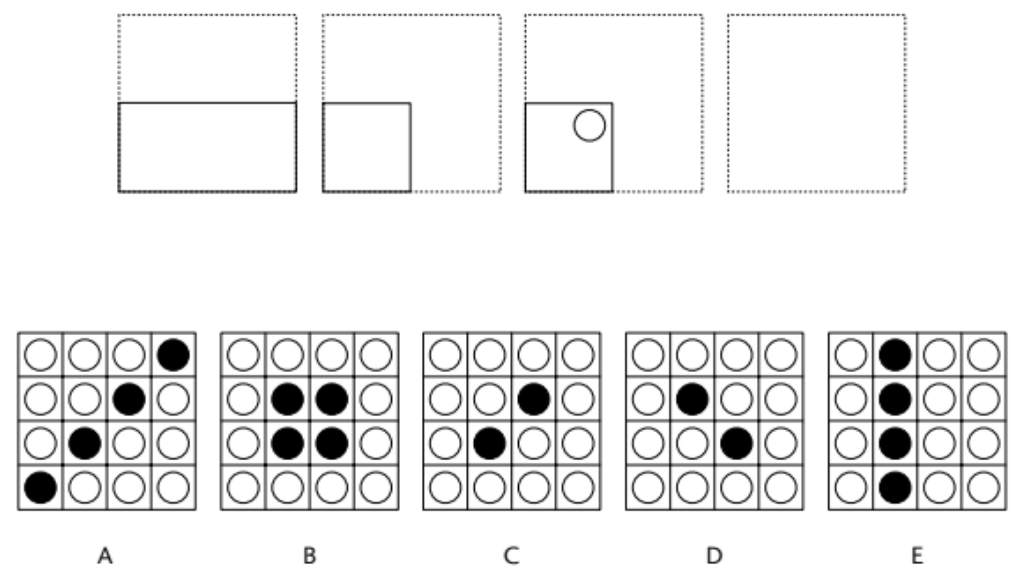
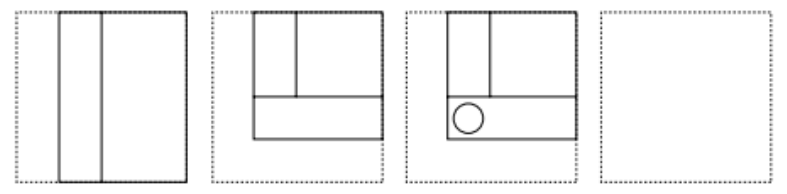
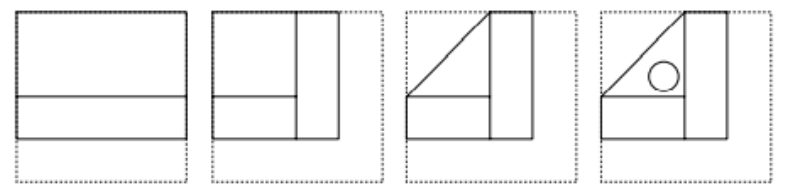
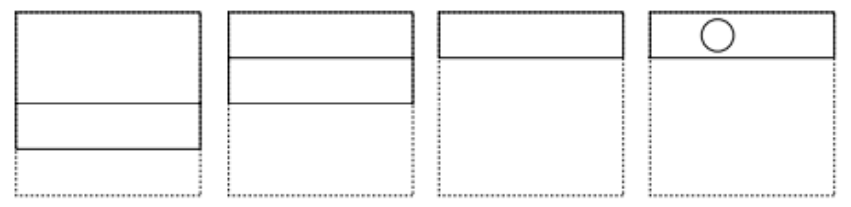
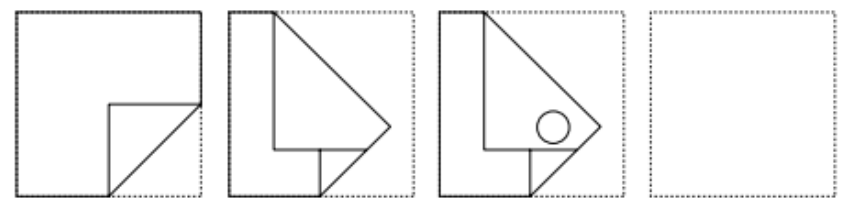
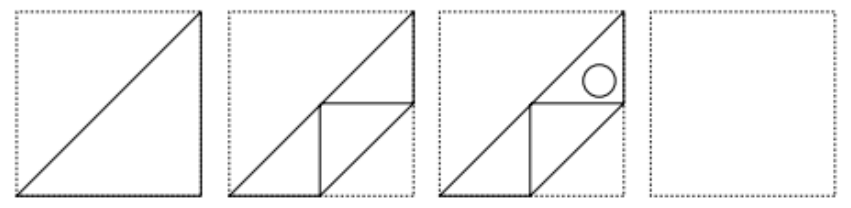
The correct answer to this example is B. With one fold, you would have two holes punched. With two folds, you will have four holes punched.
When you are ready, begin Part 4. You will have 9 minutes for its 15 questions.
Part 4: Hole Punching
For Questions 46–60, you are presented with a square of paper that has been folded at least one or more times. The solid lines indicate where the paper has been folded, and the dotted lines represent where the paper was before it was folded. The paper is never turned so that when you unfold it, it should remain in the same position. The paper will always be folded within the original square. After the last fold has been made, a hole is punched in the paper. Your task is to mentally unfold the paper and determine where the holes will be on the original square. You will be given five choices (A–E) from which to make your choice.
Example 1:
In Example 1, Figure A represents the original paper, unfolded. The second figure, B, represents the first fold. The third illustration shows where the hole is punched. After the paper is unfolded, there will be two holes represented by the dark circles in the last illustration (D).
The following example shows how this type of question will appear on the test.
Example 2:
The correct answer to this example is B. With one fold, you would have two holes punched. With two folds, you will have four holes punched.
Part 5: Cube Counting
Read the instructions and example below. The 9 minute timer for Part 5 starts when you begin. These instructions are also repeated at the top of the part.
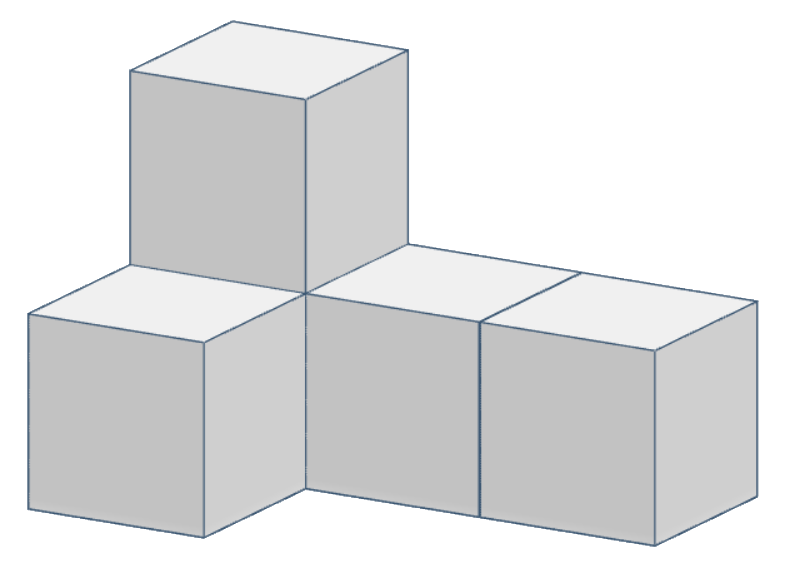
Each figure has been made by attaching cubes of an identical size. After being attached, each group was painted on all sides. Only the bottom sides on which each cube rests were not painted. Hidden cubes are those that support other cubes.
For Questions 61–75, you are asked how many cubes in the related figure have one, two, three, four, or five of their sides painted.
There will be no problems for which zero (0) is the correct answer.
Example: How many cubes have two of their exposed sides painted?
- 1 cube
- 2 cubes
- 3 cubes
- 4 cubes
- 5 cubes
There are five cubes in the figure. Four cubes are visible and one is hidden, which supports the cube on the top row. The hidden cube has only two sides painted. The top cube has five sides painted. The front cube and the cube on the right each have four sides painted, and the middle cube has three sides painted. The correct answer is A.
Remember that after the cubes have been attached, each figure was painted on all exposed sides, except the bottom.
When you are ready, begin Part 5. You will have 9 minutes for its 15 questions.
Part 5: Cube Counting
Each figure has been made by attaching cubes of an identical size. After being attached, each group was painted on all sides. Only the bottom sides on which each cube rests were not painted. Hidden cubes are those that support other cubes.
For Questions 61–75, you are asked how many cubes in the related figure have one, two, three, four, or five of their sides painted.
There will be no problems for which zero (0) is the correct answer.
Example: How many cubes have two of their exposed sides painted?
- 1 cube
- 2 cubes
- 3 cubes
- 4 cubes
- 5 cubes
There are five cubes in the figure. Four cubes are visible and one is hidden, which supports the cube on the top row. The hidden cube has only two sides painted. The top cube has five sides painted. The front cube and the cube on the right each have four sides painted, and the middle cube has three sides painted. The correct answer is A.
Remember that after the cubes have been attached, each figure was painted on all exposed sides, except the bottom.
How many cubes have three of their exposed sides painted?
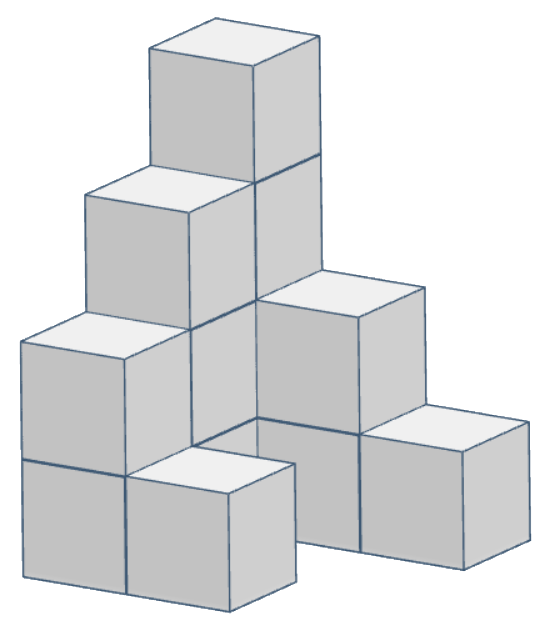
How many cubes have four of their exposed sides painted?
How many cubes have five of their exposed sides painted?
How many cubes have one of their exposed sides painted?
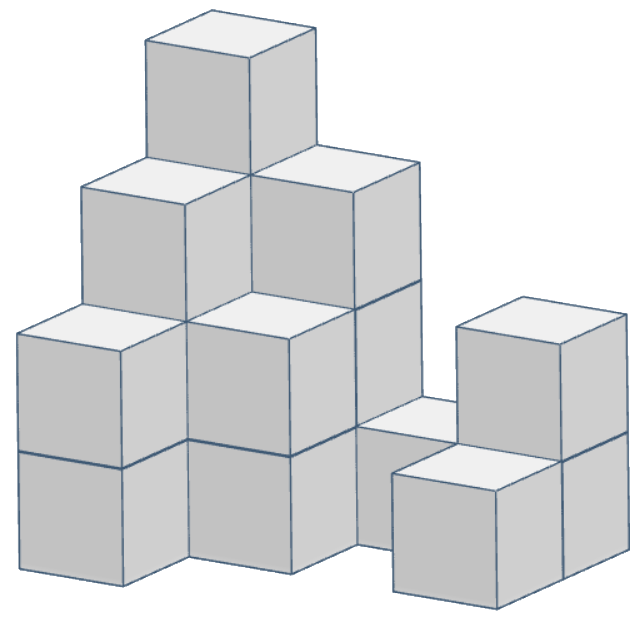
How many cubes have three of their exposed sides painted?
How many cubes have four of their exposed sides painted?
How many cubes have five of their exposed sides painted?
How many cubes have four of their exposed sides painted?
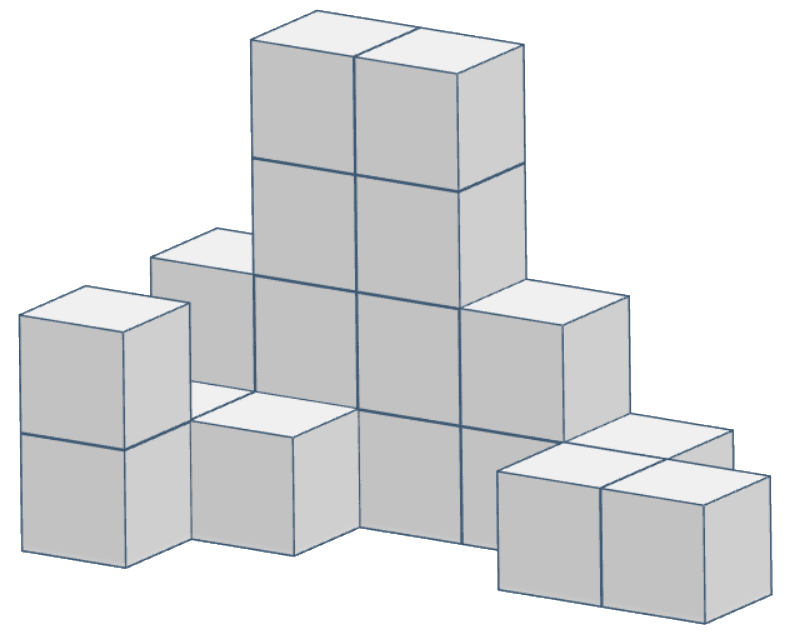
How many cubes have five of their exposed sides painted?
How many cubes have one of their exposed sides painted?
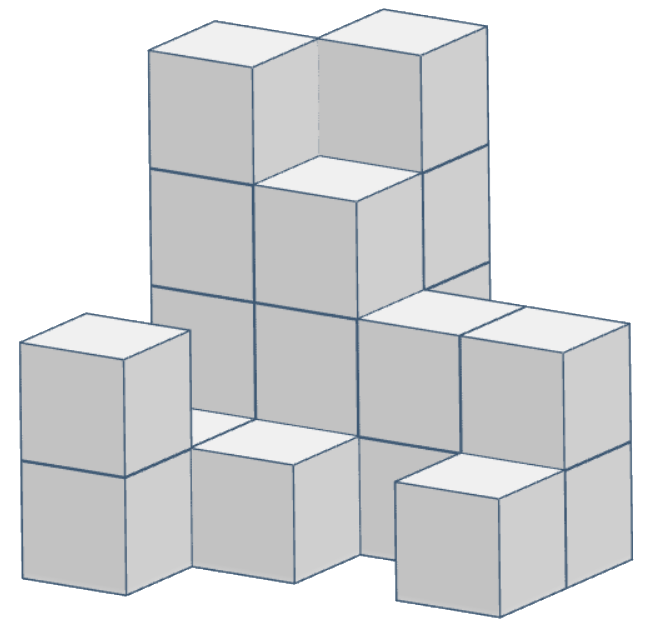
How many cubes have two of their exposed sides painted?
How many cubes have four of their exposed sides painted?
How many cubes have five of their exposed sides painted?
How many cubes have four of their exposed sides painted?
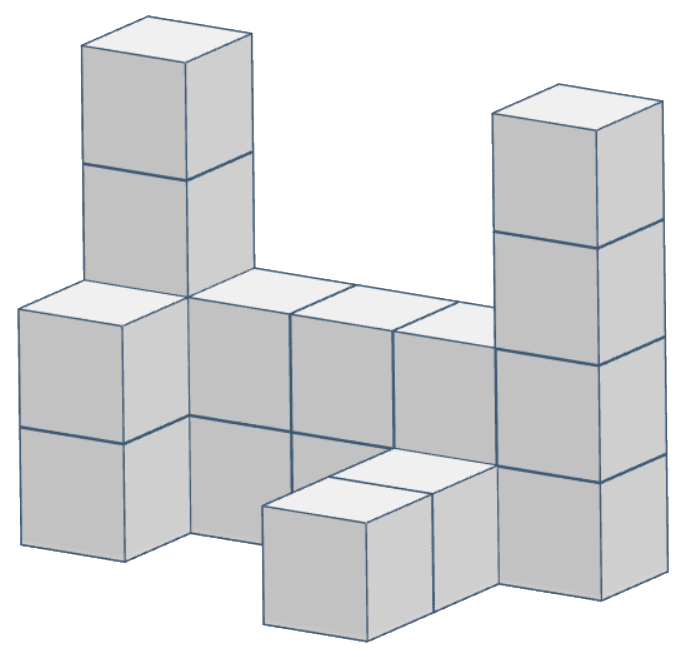
How many cubes have five of their exposed sides painted?
Part 6: Pattern Folding
Read the instructions and example below. The 12 minute timer for Part 6 starts when you begin. These instructions are also repeated at the top of the part.
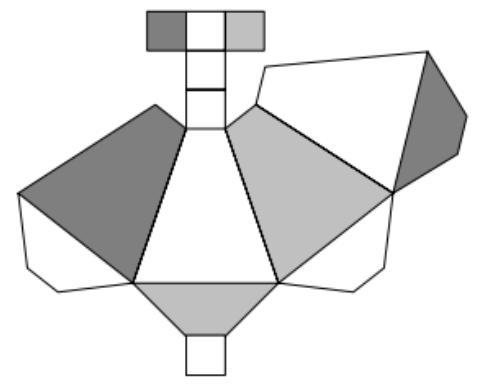
In Questions 76–90, a flat pattern is presented. Based on your perception of this pattern, you must visualize what it will look like when it is folded into a three-dimensional figure. You are given four choices but only one will be the correct answer. There is only one correct figure in each set. The outside of the pattern is what is seen in the center.
Example:
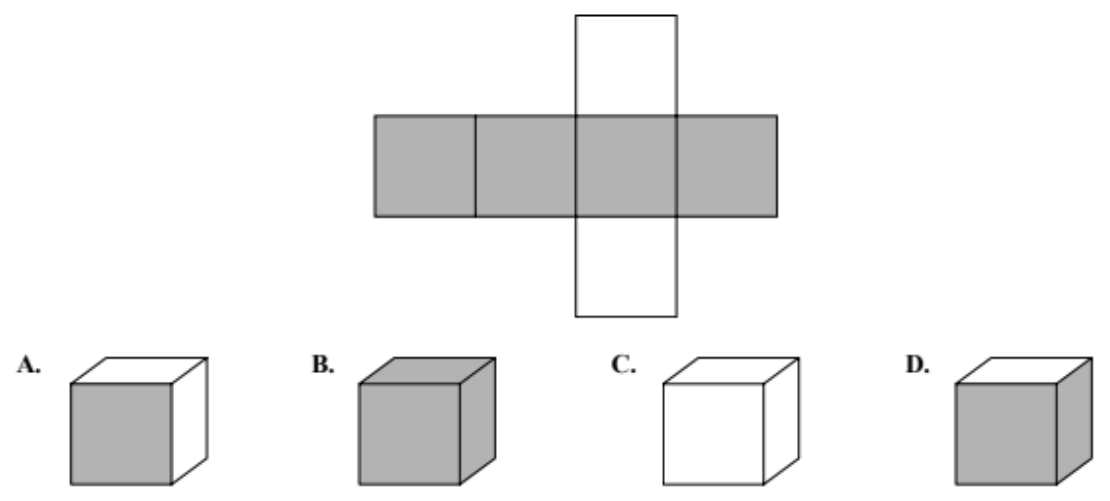
One of the figures (A, B, C, or D) can be formed from the flat pattern in the center. The only figure that corresponds to the pattern is D. If the shaded surfaces are looked at as the sides of the box, then all four sides must be shaded, while the top and the bottom are white.
When you are ready, begin Part 6. You will have 12 minutes for its 15 questions.
Part 6: Pattern Folding
In Questions 76–90, a flat pattern is presented. Based on your perception of this pattern, you must visualize what it will look like when it is folded into a three-dimensional figure. You are given four choices but only one will be the correct answer. There is only one correct figure in each set. The outside of the pattern is what is seen in the center.
Example:
One of the figures (A, B, C, or D) can be formed from the flat pattern in the center. The only figure that corresponds to the pattern is D. If the shaded surfaces are looked at as the sides of the box, then all four sides must be shaded, while the top and the bottom are white.